This post explains the procedure for using the route files in Google Maps on your phone or tablet for use on the road.
Remember not to use your phone while you are driving as this is illegal in Ireland. They WILL fine you. But your passenger can navigate or you can use your phone hands-free or un-muted to navigate your journey.
How to download the routes onto your phone
Firstly make sure you have Google Maps downloaded from the App Store onto your phone. This should work on both Apple or Android phones.
Step 1: Choose the route you want to download. Click on the link to the route.

Step 2: This will download the route to your phone.
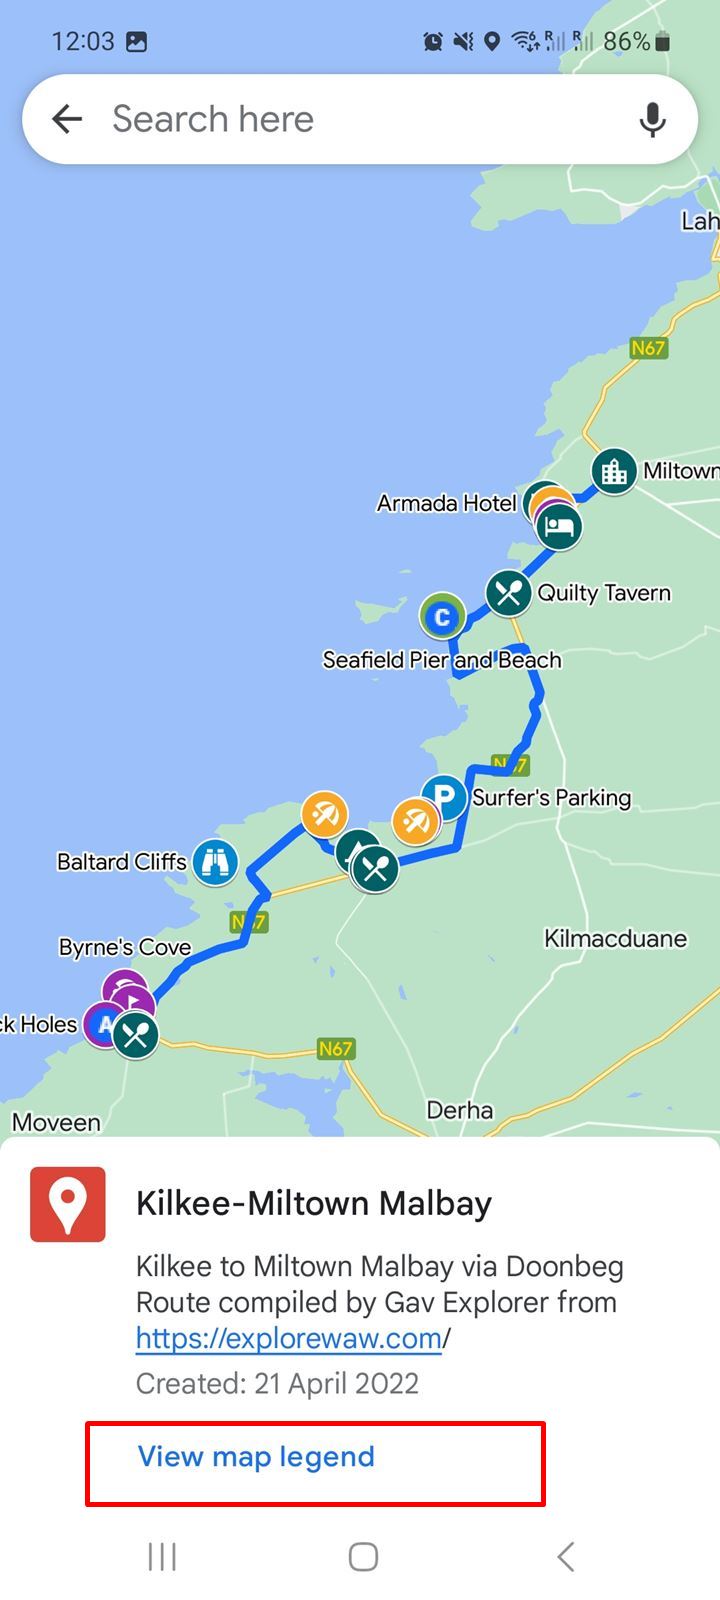
The Wild Atlantic Way route is shown as a blue line on the route and the Points of Interest are identified with coloured icons. The legend for the icons is shown below.
How to see the points of interest along the route
Step 3: Click on View Map Legend. This will show you the POI’s along the route.
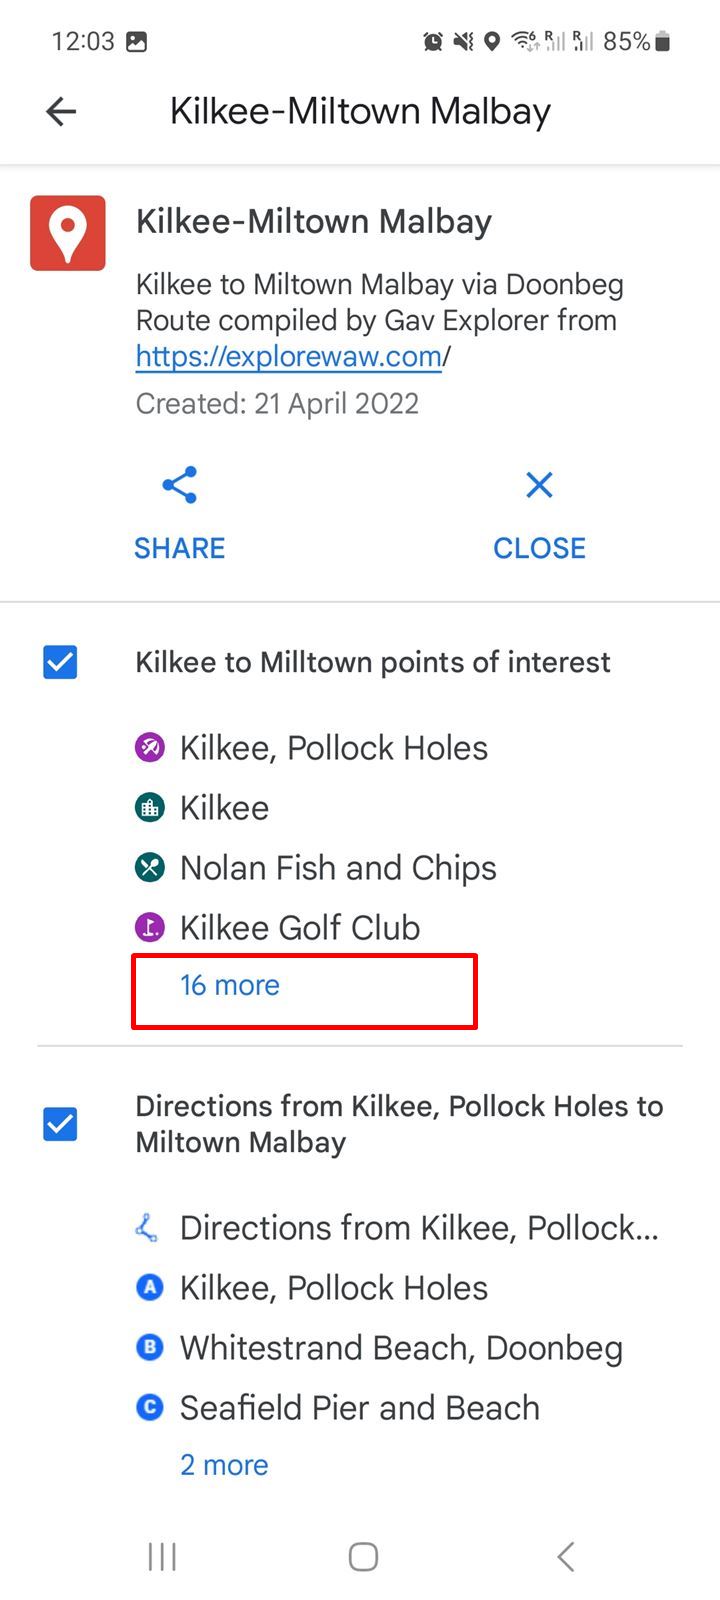
Normally I use one list of POI’s, which will have them listed in the rough order of travel. Some POI’s may not actually be on the WAW, but you can see where they are in relation to the blue route.
If you click on ‘more‘, it will show you more items.

How to find out information on the points of interest
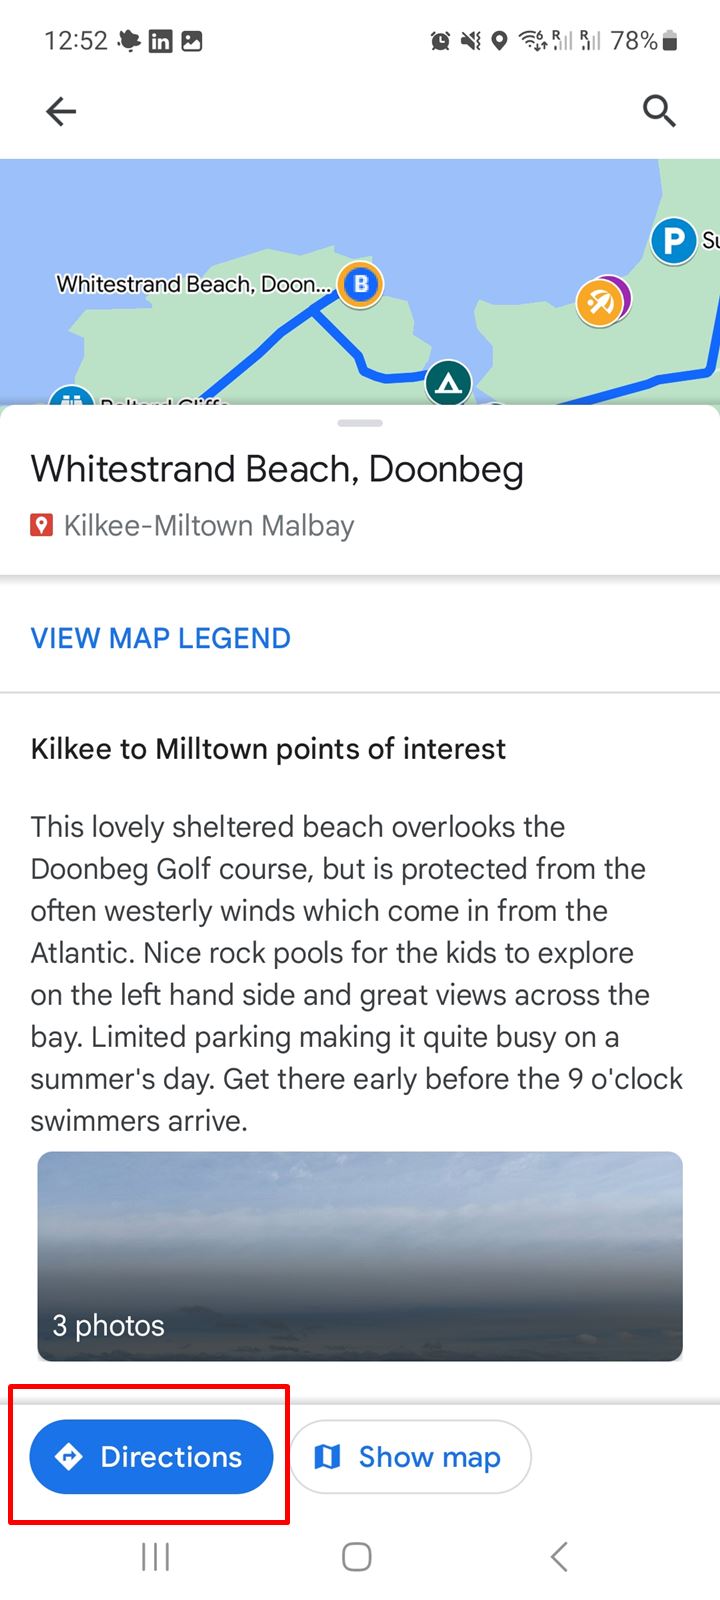
Step 4: Return to map view and click on one of the icons.

Step 5: If you click on the title of the icon it will bring you through to information on that item which will normally be some photos and a description. The description may include links to other sites which are relevant to that location (ferry companies, hotel links etc).

Clicking on the photos will show you the photos on your screen and you can scroll between them. You will find more photos here in the route maps generally speaking, than in the blog posts themselves.
Looking at the photos is a good way to determine whether you wish to visit that location or not.

If you find that the blue route is hindering you from clicking on a location, you can click it away by selecting the relevant box, shown below.

How to navigate with the route files in Google Maps
Step 6: After deciding on your next item to visit on the route, click on Directions.
Google will then give you the quickest route to that waypoint. This may not be along the WAW, as it will depend on where you are.
But you can see which route Google is bringing you on and you can normally choose alternatives, so you follow the route you want as close as possible.

Step 7: It then remains to hit ‘START’ at the bottom of the screen to begin the Navigation, after selecting the method of transport (car, public transport, walking or cycling). Google estimates the time it will take you to get there (fairly accurately).
Google Maps also has a ‘driving mode’ which I use as it is simple to use and gives clear directions. Just make sure you have set all your settings before you set off (muting etc).
And remember it is illegal to use your phone whilst driving so make sure it is easily visible.
You will of course need to have an internet connection to receive all the data included in the link. Using Google also has the advantage of letting you know if there are traffic jams along the way.
Or you can download your trip before you leave while you still have an internet connection.
It is also possible to do the same on a tablet or desktop/laptop. In fact on a computer I find it is even easier to navigate through the POI’s and determine what you can visit beforehand.
This makes it easier when you are travelling to choose the Waypoints along your journey. You can then modify your journey to suit whatever interests you.
The colouring of the icons does have some meaning. Read further to understand.
How to use the route files – understanding the icons
You will find in Google Maps when you download the route file, that each point of interest has a coloured icon to mark where it is on the map.
The icons are located as close as possible to the actual location (or entrance) of a point of interest, and may differ slightly from what is shown on Google as Google Maps locations are not always accurate.
I try to make these locations as accurate as possible but do not blame me if they are not 100%. Remember I am just trying to make your life easier.
I have used the following legend to identify what each icon roughly means or indicates.
Icon Legends


Icon colours
The icons have been grouped into colours to identify them easily. The colour of the icons has the following meaning for easy identification.

Obviously, you can use the routes to travel North-South or South-North, depending on your travel plans. Normally I will not suggest a direction of travel, unless there is good reason to do so (as on the Ring of Kerry for example).
My videos may show me travelling the Wild Atlantic Way in both ways, but that is just the way I travelled when I was filming that part.
In the route on your phone you can tap on the POI and see the photos and read a description beforehand to see if it is something you think you would want to visit.
Then when you are travelling your navigator can take you from A to B by taking you around the route from POI to POI that you wish to go to and hitting ‘Directions’.
Note: Google may decide to take you a quicker route than the Wild Atlantic Way route, so keep an eye on whether you are indeed still on the WAW, or you may miss some points of interest.
I hope this post has helped you to use the route files from my site.
As I update the files with new pictures or information, they will automatically update online.
If you want to book accommodation, have a look at the maps that are available on the County Pages to find accommodation for your trip.
TRAVELING TO IRELAND SOON?
Here are my recommended travel resources for planning your trip:
- Book your flights: Expedia & Kayak
- Hotels & Accommodation: Booking.com, Hotels & VRBO
- Tours & Activities: GetYourGuide
- Car Rentals: Booking.com, Expedia or Discovercars
- Interactive Wild Atlantic Way Guide Maps
- Travel Essentials: Ireland Packing List
Last Updated on December 29, 2025 by Gav